Creating no-bake peanut butter cups at home transforms a beloved candy into something extraordinary. These homemade peanut butter cups require just five simple ingredients and about 20 minutes of active preparation, yet they rival any store-bought version in both flavor and texture. The magic lies in the quality of your ingredients and the therapeutic process of layering rich dark chocolate with creamy, lightly sweetened peanut butter filling.
What sets homemade peanut butter cups apart is the control you have over sweetness, chocolate quality, and texture. Unlike mass-produced versions laden with stabilizers and excessive sugar, your kitchen-made treats offer pure, recognizable ingredients. The silky chocolate shell cradles a filling that’s neither too sweet nor too salty—just perfectly balanced.
This recipe emerged from countless experiments in my kitchen, refining proportions until achieving that ideal ratio of chocolate to peanut butter. The no-bake method means you’re never more than a few hours away from indulgence, with most of that time spent simply waiting for the refrigerator to work its magic.
Recipe Overview: Why These No-Bake Peanut Butter Cups Deserve Your Attention
The beauty of no-bake peanut butter cups lies in their simplicity and versatility. This recipe welcomes beginners while satisfying experienced home cooks seeking a reliable, foolproof method. The entire process unfolds in three elegant steps: melting, layering, and chilling.
Difficulty Level: Easy to Intermediate
Active Time: 20 minutes
Chilling Time: 2 hours
Total Time: 2 hours 20 minutes
Yield: 12 standard-sized peanut butter cups
These treats shine at casual gatherings, holiday cookie exchanges, or as thoughtful homemade gifts. They’re equally appropriate tucked into lunchboxes or savored slowly with afternoon coffee. The recipe scales beautifully—double or triple the quantities when feeding a crowd or preparing for gift-giving occasions.
What makes this particular approach unique is the addition of a small amount of coconut oil to the chocolate, which creates that characteristic snap when you bite through the shell. The filling incorporates powdered sugar and a touch of vanilla, elevating it beyond simple peanut butter into something more refined.
Ingredients
For the Chocolate Layers:
- 340g (12 oz) high-quality dark or semi-sweet chocolate, chopped (or chocolate chips)
- 2 tablespoons coconut oil (refined for neutral flavor)
For the Peanut Butter Filling:
- 180g (¾ cup) natural creamy peanut butter, at room temperature
- 60g (½ cup) powdered sugar, sifted
- 1 teaspoon pure vanilla extract
- Pinch of fine sea salt (omit if using salted peanut butter)
Equipment Needed:
- Standard muffin tin
- 12 paper or silicone muffin liners
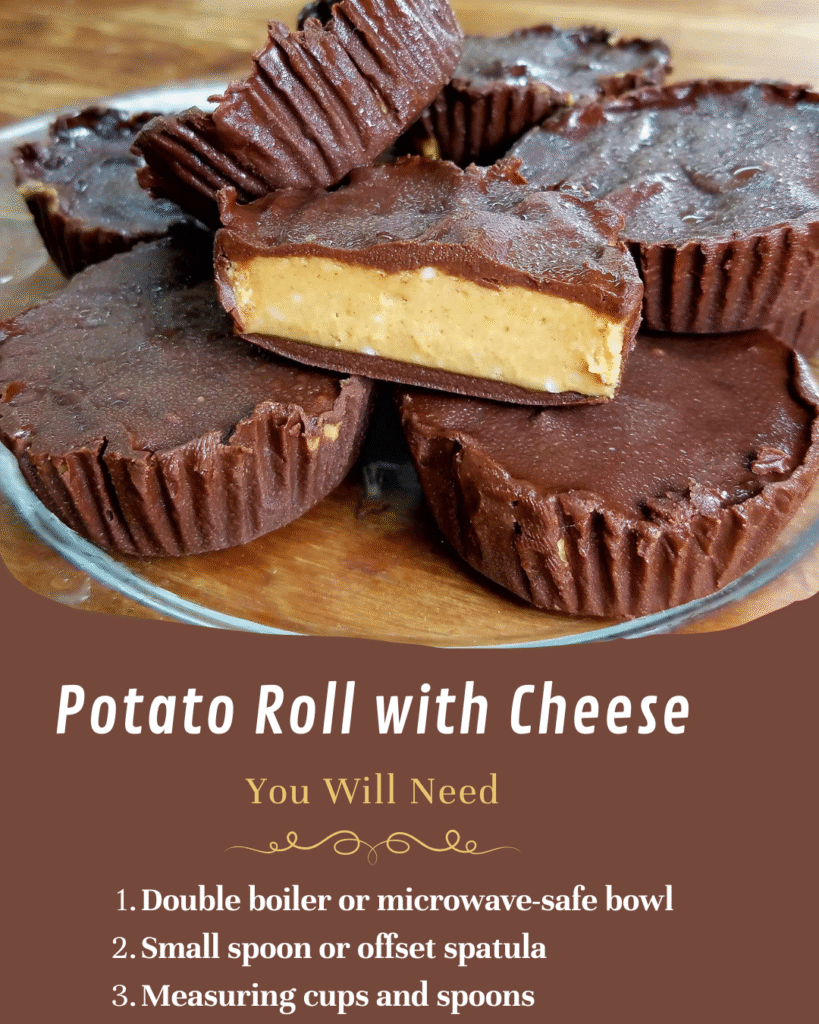
- Double boiler or microwave-safe bowl
- Small spoon or offset spatula
- Measuring cups and spoons
Step-by-Step Instructions
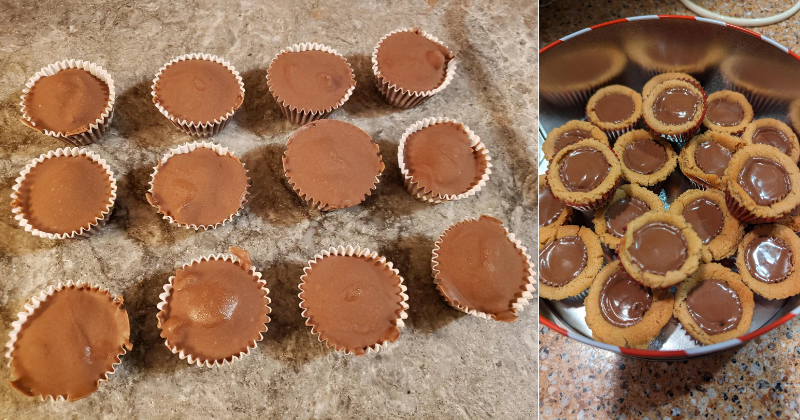
1. Prepare your workspace by lining a standard muffin tin with 12 paper liners. This foundational step prevents frustration later—ensuring the liners sit flat and secure makes the layering process considerably smoother.
2. Melt the chocolate and coconut oil together using a double boiler method. Place chopped chocolate and coconut oil in a heatproof bowl set over a pot of barely simmering water. Stir gently and continuously until the mixture becomes glossy and completely smooth, about 3-4 minutes. The coconut oil helps create that professional snap and shine. Alternatively, microwave in 30-second intervals, stirring between each, though the double boiler offers more control.
3. Spoon approximately one tablespoon of melted chocolate into each liner, ensuring it covers the bottom completely. Use the back of your spoon to coax the chocolate slightly up the sides, creating a shallow cup shape. This technique requires a delicate touch—too aggressive and you’ll tear the liner.
4. Transfer the muffin tin to your refrigerator and chill for 15 minutes until the chocolate sets firmly. This creates a stable foundation for the filling. Resist the temptation to skip or shorten this step; patience here prevents the layers from bleeding together.
5. While the chocolate bases chill, prepare the peanut butter filling. Combine peanut butter, sifted powdered sugar, vanilla extract, and salt (if using) in a medium bowl. Mix vigorously with a spatula or wooden spoon until completely smooth and uniform. The mixture should be thick yet spreadable—similar to cookie dough consistency.
6. Remove the muffin tin from the refrigerator. Drop a generous teaspoon of peanut butter filling into the center of each chocolate cup. Gently press down with your fingertip or the back of a small spoon, spreading it toward the edges but leaving a small border of chocolate visible. This border ensures complete chocolate coverage in the final product.
7. Rewarm the remaining chocolate gently if it has begun to solidify. Spoon chocolate over each peanut butter center, completely covering the filling and sealing it within the chocolate shell. Tap the muffin tin gently on your counter to release any air bubbles and create a smooth top surface.
8. Return the muffin tin to the refrigerator and chill for at least 90 minutes, or until the peanut butter cups are completely firm. For best results, allow them to set overnight—the texture improves remarkably with extended chilling time.
Tips and Tricks for Perfect Peanut Butter Cups
Chocolate Selection Matters Profoundly: The quality of your chocolate determines the final result more than any other factor. Seek chocolate with a cocoa percentage between 60-70% for balanced sweetness. Brands like Valrhona, Guittard, or Ghirardelli deliver consistently excellent results. Chocolate chips work adequately, though bar chocolate chopped into small pieces melts more smoothly.
Temperature Control Is Your Ally: Chocolate behaves best when melted gently. Water temperatures above 180°F (82°C) can cause chocolate to seize or separate. If using a double boiler, ensure the water barely simmers and never touches the bottom of your bowl. Room temperature peanut butter incorporates more easily into the filling—cold peanut butter becomes unmanageably stiff.
Storage Strategies for Maximum Freshness: Store no-bake peanut butter cups in an airtight container in the refrigerator for up to two weeks. Layer them between sheets of parchment paper to prevent sticking. They can also be frozen for up to three months—wrap individually in wax paper before placing in a freezer-safe container. Bring to room temperature for about 10 minutes before serving to achieve the ideal texture.
Ingredient Substitutions to Accommodate Preferences: Replace peanut butter with almond butter, cashew butter, or sunflower seed butter for different flavor profiles or to accommodate allergies. Swap coconut oil with a neutral-flavored oil or additional chocolate, though you’ll sacrifice some of that characteristic snap. For dairy-free versions, ensure your chocolate contains no milk solids. Honey or maple syrup can replace powdered sugar, though you’ll need to adjust quantities (start with 3 tablespoons) and the filling will be slightly softer.
Common Mistakes and How to Avoid Them: The most frequent error involves insufficient chilling between layers, resulting in muddled, swirled cups rather than distinct layers. Another pitfall is overfilling—too much peanut butter filling makes it impossible to seal properly with the top chocolate layer. Use a light hand when spreading the base chocolate up the sides; excessive thickness leaves less room for filling. Finally, avoid overheating chocolate, which causes it to become grainy or separate.
Make-Ahead Excellence: These peanut butter cups actually improve with time as flavors meld and textures settle. Prepare them up to five days before an event, storing them properly in the refrigerator. For special occasions, make a double batch and freeze half—you’ll thank yourself later when unexpected guests arrive or cravings strike.
Serving Suggestions for Various Occasions: Present them in small paper candy cups for an elegant touch at dinner parties. Dust with sea salt flakes just before serving for sophisticated flavor contrast. Crumble them over vanilla ice cream or incorporate them into brownies. Package them in clear cellophane bags tied with ribbon for charming homemade gifts.
Nutritional Information
Per serving (1 peanut butter cup):
- Calories: 215
- Total Fat: 15g
- Saturated Fat: 6g
- Cholesterol: 0mg
- Sodium: 45mg
- Total Carbohydrates: 18g
- Dietary Fiber: 2g
- Sugars: 14g
- Protein: 4g
Note: Nutritional values are approximate and vary based on specific ingredients and brands used.
Frequently Asked Questions
Can I use milk chocolate instead of dark chocolate for this recipe?
Absolutely—milk chocolate creates a sweeter, more traditional peanut butter cup reminiscent of commercial varieties. The melting process remains identical, though milk chocolate contains more sugar and dairy solids, making it slightly more temperature-sensitive. Consider reducing the powdered sugar in the filling to 1/3 cup when using milk chocolate to maintain balance. White chocolate also works beautifully, though it requires even gentler heating to prevent scorching.
Why do my peanut butter cups stick to the liners?
This frustrating issue typically stems from insufficient chilling time or using low-quality chocolate. Natural chocolate without added stabilizers needs adequate time to set completely—rushing this process leaves the chocolate soft and sticky. Silicone liners generally release more easily than paper ones. Another solution involves brushing the liners lightly with neutral oil before adding chocolate, though this changes the texture slightly. Some cooks prefer using mini silicone muffin pans without liners at all, which eliminates sticking entirely.
How can I achieve a smoother peanut butter filling?
The key lies in using natural creamy peanut butter at room temperature and sifting your powdered sugar thoroughly. Lumps in the filling usually trace back to unsifted powdered sugar or cold, stiff peanut butter. If your filling seems too thick, add coconut oil one teaspoon at a time until you achieve spreadable consistency. For ultra-smooth results, consider processing the filling in a food processor for 30 seconds, which eliminates any remaining graininess.
Can I make these peanut butter cups in different sizes?
The recipe adapts beautifully to mini muffin tins (yielding approximately 24 mini cups) or even larger muffin tins (creating 6 substantial treats). Adjust the chocolate and filling quantities proportionally—mini versions need about 1½ teaspoons chocolate per layer and ½ teaspoon filling. Larger versions require approximately 2 tablespoons chocolate per layer and 1 tablespoon filling. Chilling times remain consistent regardless of size.
What’s the best way to transport these for gifts or events?
Peanut butter cups travel best when kept cold. Place them in a single layer in an airtight container, separating layers with parchment paper if stacking becomes necessary. Transport them in a cooler with ice packs if the journey exceeds 30 minutes or if ambient temperatures are warm. For gift-giving, invest in small bakery boxes or clear containers that showcase your handiwork while providing protection. Include a note suggesting refrigeration upon arrival.
Why did my chocolate turn white after storing?
This phenomenon, called chocolate bloom, occurs when chocolate experiences temperature fluctuations. Sugar bloom happens when moisture condenses on chocolate’s surface, dissolving sugar that then recrystallizes into a white coating. Fat bloom results from cocoa butter separating and rising to the surface. While cosmetically unappealing, bloom doesn’t affect safety or significantly alter taste. Prevent bloom by storing peanut butter cups in consistent, cool temperatures and ensuring containers are completely airtight. The bloom disappears once the chocolate melts in your mouth.
Conclusion: Your Journey to Peanut Butter Cup Perfection
These no-bake peanut butter cups represent more than just a simple confection—they embody the joy of creating something beloved entirely from scratch. The meditative process of melting, layering, and waiting teaches patience while the final result rewards you with incomparable flavor and texture. Each bite reveals the care invested in selecting quality chocolate and balancing the filling’s sweetness.
I encourage you to make this recipe your own through experimentation. Perhaps you’ll discover that a sprinkle of sea salt transforms them into sophisticated treats, or that a swirl of raspberry jam adds unexpected elegance. The fundamental technique remains constant, but the possibilities for personalization are endless.
Share your no-bake peanut butter cup creations with friends and family—they make exceptional gifts that communicate thoughtfulness and care. When others taste the difference between homemade and mass-produced versions, they’ll understand why you devoted time to this craft. Most importantly, savor the process and the results, knowing you’ve mastered a skill that brings genuine happiness to yourself and others.Réessayer