
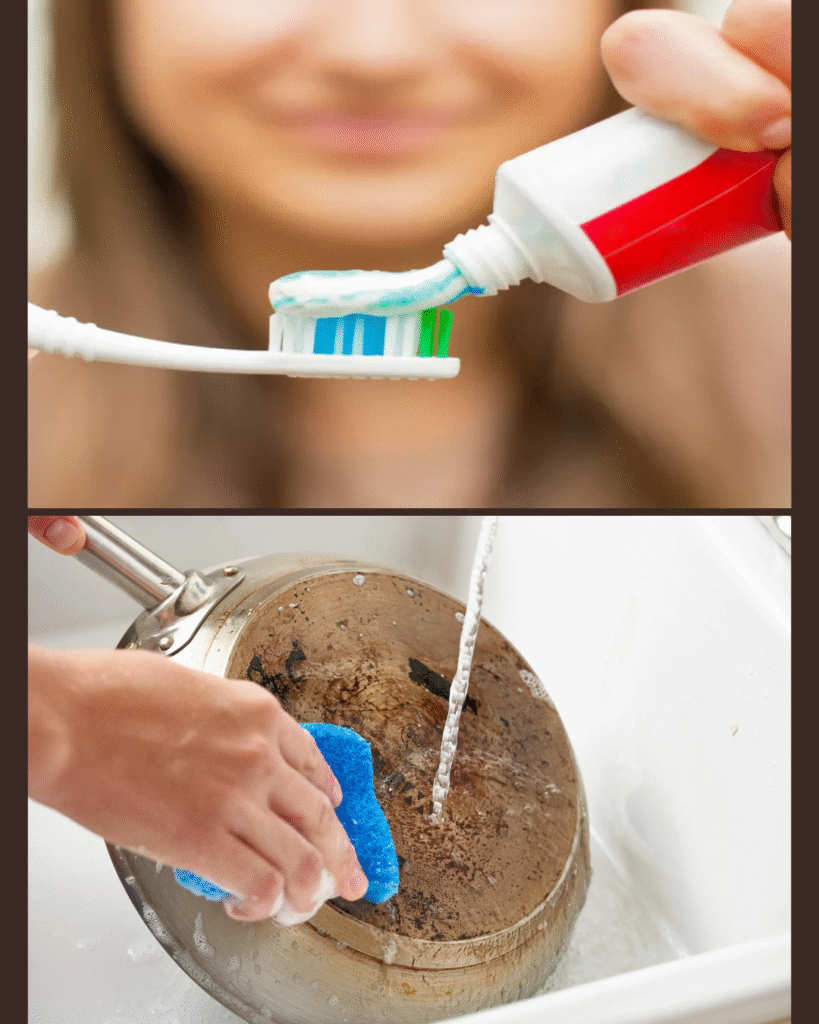
Learn how to create an effective homemade cleaner using soap, toothpaste, and baking soda. This powerful combination tackles tough stains and grime naturally.
Household cleaning often requires powerful solutions to address stubborn stains, soap scum, and accumulated grime. While commercial cleaners dominate the market, a simple combination of liquid soap, toothpaste, and baking soda creates a remarkably effective cleaning agent. This formulation leverages the complementary chemical properties of each ingredient to produce results comparable to specialized commercial products, while remaining cost-effective and using readily available materials.
The Science Behind the Ingredients
Each component in this cleaning mixture serves a specific chemical function. Baking soda, or sodium bicarbonate, acts as a mild abrasive and alkaline buffer with a pH around 8.3. Its crystalline structure provides gentle mechanical action that removes surface deposits without scratching most materials. The alkalinity helps neutralize acidic residues and facilitates the breakdown of organic matter.
Liquid soap contains surfactant molecules with hydrophilic and hydrophobic ends, allowing them to surround and suspend oil-based dirt particles in water. This emulsification process makes greasy residues water-soluble and easily removable. Most liquid soaps maintain a neutral to slightly alkaline pH, working synergistically with baking soda.
Toothpaste contributes additional abrasive particles, typically hydrated silica or calcium carbonate, which enhance the mechanical cleaning action. The mild detergents in toothpaste complement those in liquid soap, while ingredients like hydrogen peroxide in whitening formulas add mild bleaching properties. The combination creates a paste with optimal consistency for vertical surfaces and detailed work.
Essential Materials and Proportions
For a standard batch of this homemade cleaner, you will need three tablespoons of baking soda as the base ingredient. Add two tablespoons of liquid dish soap, preferably a degreasing formula without heavy moisturizers that could leave residue. Include one tablespoon of white toothpaste, avoiding gel formulas which lack sufficient abrasive content. The white paste varieties contain the optimal concentration of cleaning particles.
A small mixing bowl or container allows proper blending. Use a spoon or small whisk for combining ingredients. Have a damp cloth or sponge ready for application, and prepare a clean, dry cloth for buffing surfaces after cleaning. For tougher jobs, a soft-bristled brush helps work the mixture into textured surfaces or grout lines.
The proportions create a paste-like consistency that adheres to vertical surfaces while remaining spreadable. If the mixture appears too thick, add liquid soap in half-teaspoon increments rather than water, which would dilute the cleaning power. Too thin, and it will run off surfaces before the ingredients can work effectively.
Preparation Method and Consistency
Begin by placing three tablespoons of baking soda in your mixing container. Add the toothpaste first, working it into the baking soda with your mixing tool. This initial combination creates a granular paste. The toothpaste helps bind the baking soda particles while adding its own cleaning compounds.
Next, incorporate the liquid soap gradually, adding approximately half the amount initially. Mix thoroughly, observing how the consistency changes. The soap transforms the dry mixture into a smooth, spreadable paste. Add the remaining soap while continuing to mix, ensuring all baking soda particles are fully incorporated. The final texture should resemble thick frosting, firm enough to stay in place but soft enough to spread easily.
Mix for about thirty seconds beyond the point where ingredients appear combined. This ensures even distribution of all components throughout the mixture. Small lumps of unmixed baking soda will create inconsistent results. The paste should show a uniform light color with no visible streaks of toothpaste or dry pockets of baking soda.
Effective Application Techniques
Apply this cleaner to surfaces using a damp sponge or cloth, which helps activate the cleaning agents. For horizontal surfaces like countertops or stovetops, spread a thin layer across the area requiring treatment. Allow the mixture to sit for two to three minutes on moderate stains, giving the alkaline components time to break down organic residues.
Vertical surfaces like bathroom tiles or shower walls require a slightly thicker application. Press the paste onto the surface rather than attempting to spread it like paint. The consistency should keep it in place while you work on adjacent areas. For particularly stubborn soap scum or hard water deposits, apply the paste and let it work for five to seven minutes before scrubbing.
Use circular motions when scrubbing, which distributes the abrasive action evenly across the surface. Apply moderate pressure, allowing the baking soda and toothpaste particles to do the mechanical work. Excessive force is unnecessary and may damage delicate surfaces. For grout lines or textured surfaces, use a soft brush to work the paste into crevices where grime accumulates.
Optimal Surfaces and Applications
This cleaner excels on bathroom fixtures including sinks, bathtubs, and shower surrounds. The combination effectively removes soap scum, toothpaste residue, and light hard water staining. Chrome and stainless steel faucets respond particularly well, with the mild abrasives polishing the surface while removing water spots and fingerprints.
Kitchen applications include stovetops, especially around burners where grease and food particles accumulate. The paste cuts through baked-on cooking residue on enamel or glass cooktops, though extra caution and gentler scrubbing protects glass surfaces. Use it on tile backsplashes where cooking oils create a sticky film that attracts dust and grime.
Grout lines between tiles benefit significantly from this cleaner. The paste consistency allows it to stay in the recessed grout while the baking soda’s mild bleaching action lightens discoloration. Apply with an old toothbrush for precision work, scrubbing along the grout lines rather than across them. White grout shows particularly noticeable improvement, though colored grout should be tested in an inconspicuous area first.
Limitations and Surface Precautions
Avoid using this cleaner on natural stone surfaces including marble, granite, or limestone. The alkalinity of baking soda can etch these materials over time, damaging their polished finish. Acidic residues in some stones react adversely with alkaline cleaners, causing discoloration or surface dulling. Similarly, avoid unsealed wood surfaces where moisture and cleaning agents can penetrate and cause swelling or discoloration.
Delicate finishes on appliances or fixtures warrant careful testing. Apply a small amount in an hidden area, let it sit briefly, then rinse and examine for any adverse effects. Some decorative finishes or coatings may be too delicate for even mild abrasives. Older porcelain with a worn glaze can scratch more easily than newer surfaces, requiring gentler application and less scrubbing pressure.
Electronics and their surrounding areas should not be cleaned with this mixture due to moisture content. Water and cleaning agents can damage sensitive components or leave residue that interferes with functionality. Use appropriate electronics-specific cleaners for these applications.
Rinsing and Finishing Procedures
Thorough rinsing is essential to remove all cleaner residue, which can leave a white film if left to dry on surfaces. Use clear, warm water and a clean cloth or sponge, wiping the area multiple times. The soap content means surfaces may feel slightly slippery initially, indicating remaining surfactants that require additional rinsing.
For bathroom fixtures, rinse with running water when possible, allowing the stream to wash away dissolved residues. On larger areas like shower walls or countertops, use a well-wrung cloth to wipe the surface, then follow with a dry cloth. This two-step process ensures complete residue removal while preventing water spots.
Buffing the surface with a dry microfiber cloth after rinsing produces the best shine, especially on metal fixtures and glass surfaces. The slight polishing action of the cloth removes any microscopic residue while enhancing the natural luster of the material. This final step transforms clean surfaces into truly sparkling ones.
Storage and Batch Considerations
This cleaner works best when freshly mixed immediately before use. The chemical interactions between ingredients begin as soon as they combine, with the alkalinity of baking soda slowly reacting with acidic components in soap and toothpaste. Within hours, the mixture may separate or lose some effectiveness as these reactions progress.
If you must store mixed cleaner, use an airtight container to prevent moisture loss, which causes the paste to dry and harden. Refrigeration can extend usability to approximately one week, though the consistency may change and require re-mixing. Store away from children and pets, clearly labeling the container as a cleaning product.
For regular cleaning needs, measuring and mixing a fresh batch takes only two minutes and ensures optimal cleaning power. The individual ingredients store indefinitely in their original containers, ready for quick preparation when needed. This approach also allows adjustment of proportions for specific cleaning challenges.
Enhanced Variations for Specific Tasks
For extra degreasing power in kitchen applications, substitute half the liquid soap with liquid castile soap, which contains higher concentrations of cleaning agents. This modification creates a more aggressive formula for removing baked-on cooking oils and carbonized food residues.
Adding one teaspoon of white vinegar to the basic formula creates a foaming action as the acid reacts with alkaline baking soda. This effervescence helps lift dirt from textured surfaces. However, add vinegar only immediately before use, as the reaction dissipates quickly. The acidic addition also makes this variation unsuitable for natural stone or marble.
For whitening applications on grout or porcelain, select a toothpaste containing hydrogen peroxide and increase the toothpaste proportion to two tablespoons while reducing liquid soap to one tablespoon. This creates a thicker paste with enhanced bleaching properties for addressing discoloration. Allow this modified version to sit longer, up to ten minutes, before scrubbing.
Cost Effectiveness and Environmental Considerations
A typical batch of this cleaner costs approximately thirty to fifty cents in materials, depending on ingredient quality and brand selection. This represents significant savings compared to specialized commercial cleaners that often cost several dollars per bottle. A standard recipe produces enough paste to clean an average bathroom or kitchen thoroughly.
The ingredients are generally less harsh on aquatic ecosystems than many commercial formulations containing phosphates, chlorine bleach, or synthetic fragrances. Baking soda is completely biodegradable and non-toxic to aquatic life. Most liquid soaps break down readily in water treatment systems. Toothpaste, while containing some synthetic ingredients, is used in such small quantities that environmental impact remains minimal.
Packaging waste decreases substantially when using this homemade solution. The ingredients come in containers you would purchase anyway for other household uses, eliminating the need for additional plastic bottles dedicated solely to cleaners. This reduces both consumer costs and environmental burden associated with manufacturing and disposing of single-use cleaning product containers.
Troubleshooting Common Issues
If the paste appears too grainy or doesn’t spread smoothly, the baking soda may not be adequately incorporated into the liquid components. Add another half-teaspoon of liquid soap and mix vigorously for an additional thirty seconds. The extra surfactants will help bind the particles into a more cohesive paste.
Surfaces showing a white residue after cleaning indicate insufficient rinsing. This film consists of dried baking soda and soap residue. Simply rewipe the area with a damp cloth and more water, followed by thorough drying. Some very hard water may contribute to this issue, as minerals combine with soap to form insoluble compounds. In such cases, a final rinse with distilled water can prevent residue formation.
Lack of cleaning effectiveness suggests either inadequate scrubbing time or a mismatch between the cleaner and the type of soil present. Organic stains and soap scum respond well to this formulation, but mineral deposits like rust or very hard limescale may require acidic cleaners instead. Reassess the nature of the staining and consider whether an alkaline cleaner is appropriate for that specific situation.
This powerful homemade cleaner combines simple ingredients into an effective solution for numerous household cleaning challenges. The synergistic action of baking soda’s abrasiveness, soap’s emulsifying properties, and toothpaste’s additional cleaning compounds creates results that often surprise users accustomed to commercial products. Regular use maintains surfaces in excellent condition while providing significant cost savings and reducing environmental impact compared to conventional cleaning products.