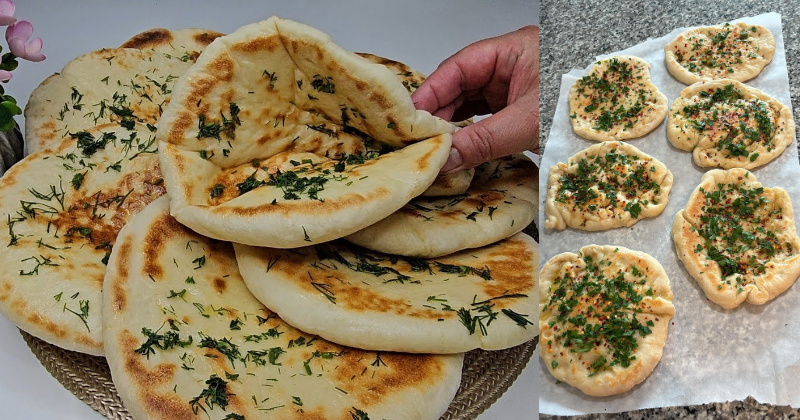
Turkish bread, known as « pide » or « ramazan pidesi, » represents centuries of baking tradition that transforms simple ingredients into something extraordinary. This pillowy, golden-crusted bread with its distinctive dimpled surface and signature sesame or nigella seed topping has graced Turkish tables for generations, serving as the perfect accompaniment to meals or standing beautifully on its own. Whether you’re seeking to recreate the aromatic warmth of an Istanbul bakery or simply want to master an impressive homemade bread, this comprehensive guide will walk you through every step of crafting authentic Turkish bread in your own kitchen. The process is more forgiving than you might imagine, and the results—a tender crumb with a slightly chewy crust—will transport you straight to the bustling streets of Turkey.
What Makes This Turkish Bread Recipe Special
This recipe honors traditional methods while adapting seamlessly to the modern home kitchen. Unlike many commercial versions, homemade Turkish bread offers unparalleled freshness and allows you to control every ingredient. The technique focuses on developing proper gluten structure through gentle kneading and patient fermentation, creating that characteristic soft interior.
Difficulty level: Intermediate – requires some bread-making experience but remains accessible to dedicated beginners.
Time commitment: Approximately 3 hours total, with most time dedicated to rising rather than active work.
Ideal occasions: Turkish bread elevates everything from family dinners and holiday gatherings to casual weekend brunches. It pairs magnificently with mezze spreads, grilled meats, or simply good olive oil and za’atar. The bread also holds cultural significance during Ramadan, when special versions appear in bakeries throughout Turkey.
Ingredients
For the Dough:
- 500g (4 cups) all-purpose flour or bread flour
- 300ml (1¼ cups) warm water (38-43°C/100-110°F)
- 10g (2 teaspoons) active dry yeast or 15g fresh yeast
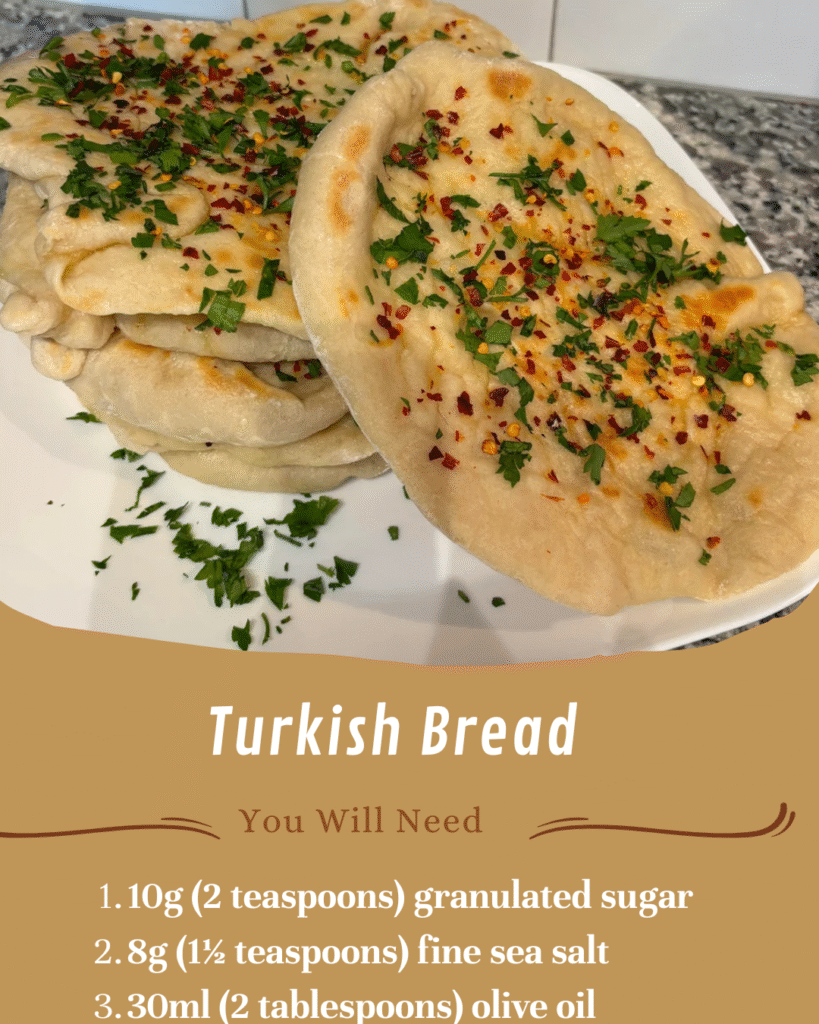
- 10g (2 teaspoons) granulated sugar
- 8g (1½ teaspoons) fine sea salt
- 30ml (2 tablespoons) olive oil
- 15g (1 tablespoon) plain yogurt (optional, for extra tenderness)
For the Topping:
- 1 egg yolk
- 15ml (1 tablespoon) milk
- 15ml (1 tablespoon) olive oil
- 20g (2 tablespoons) sesame seeds
- 10g (1 tablespoon) nigella seeds (black cumin/kalonji)
Equipment needed: Large mixing bowl, clean kitchen towel, baking sheet or pizza stone, small bowl for egg wash, pastry brush, fork or traditional pide stamp
Step-by-Step Instructions
- Activate the yeast: In a small bowl, combine warm water, sugar, and yeast. Stir gently and let stand for 5-10 minutes until the mixture becomes foamy and fragrant. This step ensures your yeast is alive and active—a crucial foundation for successful bread.
- Prepare the dough: In a large mixing bowl, combine flour and salt. Create a well in the center and pour in the activated yeast mixture, olive oil, and yogurt if using. Begin mixing with a wooden spoon or your hands until a shaggy dough forms.
- Knead to perfection: Turn the dough onto a lightly floured surface. Knead for 8-10 minutes until the dough becomes smooth, elastic, and slightly tacky but not sticky. You’ll feel the transformation as the gluten develops—the dough will become more cohesive and spring back when pressed. Add minimal flour during kneading; a slightly sticky dough yields softer bread.
- First rise: Shape the dough into a smooth ball and place it in a lightly oiled bowl, turning once to coat all surfaces. Cover with a damp kitchen towel or plastic wrap. Let rise in a warm, draft-free location for 60-90 minutes, until doubled in size. The dough should feel light and airy when gently pressed.
- Shape the bread: Punch down the risen dough gently to release excess gas. Divide into two equal portions for standard loaves or keep whole for one large bread. Shape each portion into a smooth ball, then flatten into an oval or round disk approximately 2cm (¾ inch) thick. Place on a parchment-lined baking sheet, leaving space between loaves if making two.
- Create the signature pattern: Using your fingertips or a traditional pide stamp, create deep dimples across the surface in parallel rows, leaving a slight border around the edges. These indentations aren’t merely decorative—they prevent excessive rising in the center and create the characteristic texture.
- Second rise: Cover the shaped loaves lightly and let rest for 30-40 minutes. They should puff up noticeably but not quite double. Meanwhile, preheat your oven to 220°C (425°F). If using a baking stone, place it in the oven during preheating.
- Apply the glaze: Whisk together egg yolk, milk, and olive oil until smooth. Gently brush this mixture over the entire surface of each loaf, being careful not to deflate the dough. The glaze creates that beautiful golden-brown finish and helps the seeds adhere.
- Add seeds: Sprinkle sesame and nigella seeds generously over the glazed surface, pressing them slightly to ensure adherence. The combination provides both visual appeal and subtle nutty, slightly peppery flavors.
- Bake to golden perfection: Transfer the bread to the preheated oven. Bake for 15-20 minutes until deeply golden brown on top and the bottom sounds hollow when tapped. The internal temperature should reach 190-200°F (88-93°C). Rotate the baking sheet halfway through for even browning.
- Cool properly: Remove from the oven and immediately brush with a light coating of olive oil or melted butter for extra softness and shine. Transfer to a wire rack and let cool for at least 15 minutes before slicing. The bread continues cooking slightly as it cools, and cutting too early releases excess steam.
Tips and Tricks for Perfect Turkish Bread
Temperature matters profoundly: The water temperature for activating yeast should feel comfortably warm on your wrist—neither hot nor lukewarm. Water that’s too hot kills yeast, while cold water prevents proper activation. This seemingly small detail determines whether your bread rises beautifully or remains disappointingly dense.
Flour variations: Bread flour creates a slightly chewier texture due to higher protein content, while all-purpose flour yields softer, more tender bread. I’ve found that a 50-50 blend offers an ideal middle ground. Turkish bakers traditionally use high-extraction flour, which falls between whole wheat and white flour in refinement. You can approximate this by substituting 50g of all-purpose flour with whole wheat flour.
Storage instructions: Turkish bread stays fresh at room temperature for 2-3 days when stored in a bread box or paper bag—avoid plastic, which softens the crust unpleasantly. For longer storage, slice and freeze in an airtight container for up to 3 months. Refresh frozen slices by sprinkling with water and warming briefly in a 180°C (350°F) oven.
Make-ahead strategy: Prepare the dough through the first rise, then refrigerate overnight in a covered bowl. The slow, cold fermentation develops deeper flavor complexity. The next day, bring to room temperature for 30 minutes before shaping and proceeding with the recipe. This method actually improves the final bread’s taste and texture.
Common mistakes to avoid: Resist the temptation to add excessive flour during kneading. A slightly sticky dough produces softer bread. Additionally, don’t skip the dimpling step—undimpled bread develops an uneven, overly puffy center. Finally, ensure your oven is fully preheated; bread placed in an insufficiently hot oven won’t develop proper crust or rise.
Serving suggestions: Tear rather than slice Turkish bread for the most authentic experience. Serve warm alongside grilled kebabs, labneh, hummus, or baba ganoush. The bread also makes exceptional sandwiches when split horizontally. Try it for breakfast with feta cheese, olives, tomatoes, and cucumbers—a classic Turkish morning spread.
Yogurt’s secret role: The tablespoon of yogurt in this recipe isn’t traditional in all Turkish bread variations, but it contributes remarkable tenderness and a subtle tang that enhances flavor complexity. The lactic acid in yogurt also strengthens gluten structure while keeping the crumb soft—a beautiful paradox of bread science.
Nutritional Information
Per serving (1/8 of recipe, approximately 85g):
- Calories: 215
- Protein: 6g
- Carbohydrates: 38g
- Dietary Fiber: 2g
- Total Fat: 4g
- Saturated Fat: 0.5g
- Sodium: 295mg
- Calcium: 25mg
- Iron: 2.5mg
Note: Nutritional values are approximate and may vary based on specific ingredients used.
Frequently Asked Questions
Can I make Turkish bread without a stand mixer?
Absolutely—traditional Turkish bread has been made by hand for centuries. Hand kneading actually gives you better tactile feedback about dough development. The process takes 8-10 minutes of rhythmic kneading, pushing the dough away with the heel of your hand, folding it back, and rotating. You’ll know it’s ready when the dough becomes smooth, elastic, and springs back when pressed. Many bakers, myself included, prefer the meditative quality of hand kneading and the intimate connection it creates with the dough.
Why didn’t my Turkish bread rise properly?
Several factors affect rising. First, check your yeast’s expiration date—expired yeast won’t activate. Ensure your water temperature falls within the ideal range (38-43°C/100-110°F). Environmental temperature also matters; dough rises best around 24-27°C (75-80°F). In cooler kitchens, place the bowl in a turned-off oven with the light on, or near (not on) a warm stovetop. Finally, give it adequate time—rushing the rise produces dense bread. If your kitchen is particularly cold, rising might take up to 2 hours.
Can I substitute instant yeast for active dry yeast?
Yes, instant yeast works excellently and can be mixed directly into the flour without activation. Use 7g (1¾ teaspoons) instant yeast as it’s slightly more potent than active dry yeast. The first rise might proceed 15-20 minutes faster with instant yeast. I keep both types in my kitchen but reach for instant yeast when I’m short on time, as it eliminates the activation step.
What’s the difference between Turkish pide and regular Turkish bread?
The terminology can be confusing as « pide » refers to both the everyday flat Turkish bread (ramazan pidesi) and the boat-shaped pide topped with various ingredients (similar to Turkish pizza). This recipe produces ramazan pidesi—the round or oval flatbread with dimples and seeds. Boat-shaped pide uses similar dough but is shaped differently and topped with cheese, meat, or vegetables before baking. Both belong to Turkey’s rich bread-making tradition but serve different culinary purposes.
How can I achieve a softer crust on my Turkish bread?
Several techniques promote softness. Brush the hot bread with melted butter or olive oil immediately after baking—this creates a moisture barrier that prevents excessive crust hardening. Some Turkish bakers also place a clean kitchen towel over the cooling bread for the first 10 minutes, trapping steam to soften the crust. Avoid overbaking, as extra minutes in the oven create a thicker, crispier crust. Finally, ensure adequate hydration in your dough; don’t add excessive flour during kneading.
Can I add herbs or spices to the dough?
While traditional Turkish bread keeps the dough relatively plain, allowing the seeds and slight sweetness to shine, regional variations exist. You can incorporate 1 teaspoon of dried herbs (thyme, oregano, or mint) or spices (cumin, coriander) into the flour. Some Turkish bakers add a pinch of mahlep (ground cherry pit) for a subtle almond-like flavor, or mastic for distinctive aromatic notes. However, I recommend mastering the classic version first before experimenting with additions.
Conclusion
Turkish bread represents more than sustenance—it embodies centuries of culinary wisdom passed through generations of bakers. The process of creating this bread connects you to a rich cultural tradition while filling your home with irresistible aromas. Though the recipe requires patience, particularly during the rising stages, the active work remains manageable and deeply satisfying. Each element—from the gentle kneading to the rhythmic dimpling—contributes to the final masterpiece.
I encourage you to embrace this baking adventure and make Turkish bread part of your regular repertoire. The versatility of this bread means you’ll find countless opportunities to serve it, and your efforts will be rewarded with enthusiastic appreciation from everyone at your table. Once you’ve mastered the technique, you’ll discover that homemade Turkish bread transforms ordinary meals into memorable occasions. Try this recipe, adjust it to your preferences, and share your experience—the journey of bread-making becomes infinitely richer when shared with others.
Prep time: 20 minutes | Rising time: 2-2.5 hours | Baking time: 15-20 minutes | Total time: 3 hours | Yield: 2 medium loaves or 1 large loaf (8-10 servings)